
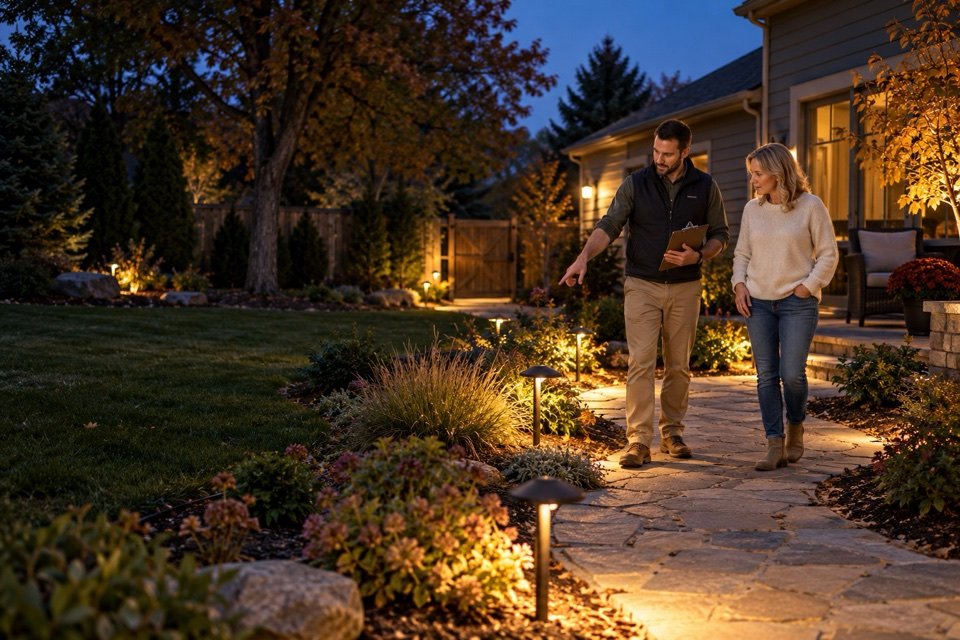
As Central Kansas evenings grow longer, it becomes easier to notice which parts of a property work after sunset—and which do not. A front walk disappears between the driveway and porch. One patio step blends into the surface below it. A bright wall light throws so much glare that the planting bed beyond it becomes harder to see.
Outdoor landscape lighting can improve safety, wayfinding, curb appeal and the useful hours of a patio, but only when the light has a clear job. More fixtures and more brightness do not automatically produce a better result. A thoughtful plan places a modest amount of warm, controlled light where eyes need information and leaves the rest of the property comfortably dark.
This guide explains how homeowners can plan paths, steps, entries, patios and landscape accents as one system—before choosing fixtures or digging cable routes.
Begin with a night walk, not a fixture catalog
Walk the property after dark from every direction a guest, family member or worker might use. Start in the parking area, approach the front door, unlock it, follow the route to the backyard and return. Repeat the walk while carrying a bag or looking after a child. Notice where you slow down because the route is uncertain.
Mark the places that communicate important information:
- Arrival points: the driveway edge, parking area, front walk and address.
- Changes in elevation: individual steps, stair runs, curbs, retaining-wall edges and uneven transitions.
- Changes in direction: path turns, gates and the point where one surface becomes another.
- Tasks: door locks, grills, outdoor kitchens, trash areas and work surfaces.
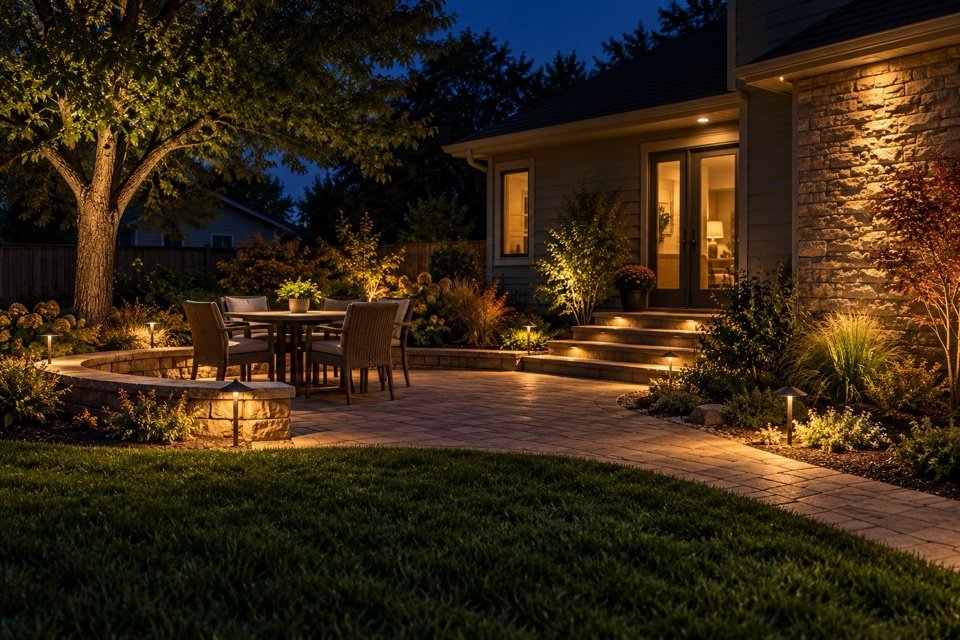
- Gathering areas: patios, decks, seating walls and paths between the house and yard.
- Views: one specimen tree, a textured wall or a planting composition worth seeing from indoors.
Look back toward each fixture location as well as forward along the route. A light that seems helpful from the house may shine directly into the eyes of someone approaching from the driveway. Also view the property from inside; poorly aimed fixtures can reflect in windows or spill into bedrooms.
Build the plan in three layers
A useful lighting plan has a hierarchy. Safety and task lighting come first, wayfinding comes second, and accent lighting comes last. When every plant, wall and path receives equal brightness, the eye loses the visual cues that make the space understandable.
1. Task and safety lighting
Illuminate step treads, thresholds, locks, work areas and other places where someone needs to see detail. The fixture should reveal the surface without exposing a glaring lamp. Step lights mounted into a riser, shielded downlights or carefully placed wall lights can provide useful illumination while keeping the source out of direct view.
2. Wayfinding
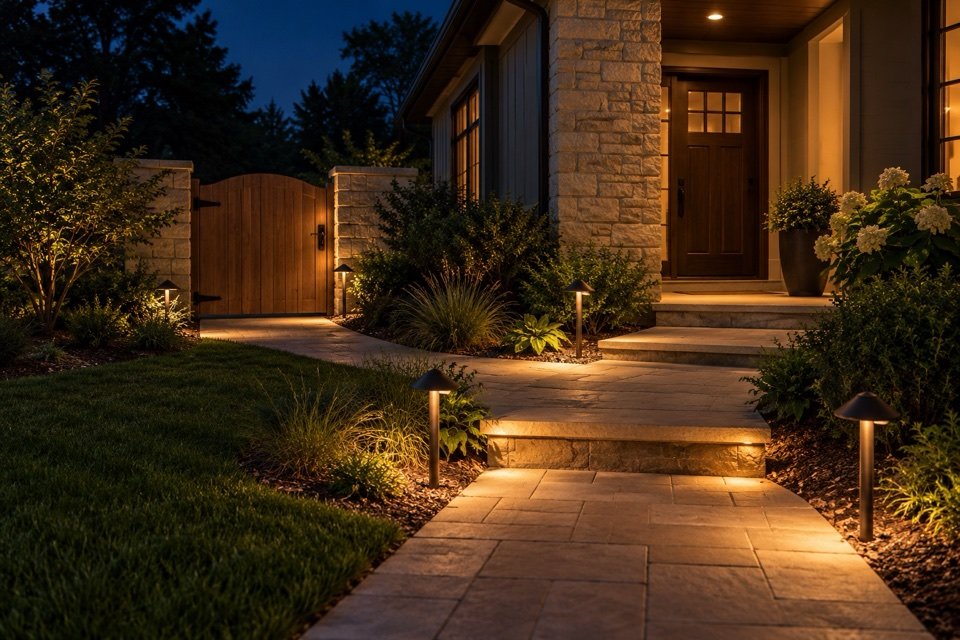
Wayfinding light makes the route legible. It does not require a fixture every few feet. Light the beginning of the path, important turns, intersections, gates and changes in level. Allowing gentle darker spaces between those points often looks calmer and provides enough information for movement.
3. Restrained accent lighting
Accent light creates depth after the practical needs are solved. One softly lit tree or stone wall can give the yard a focal point and help define its boundary. Aim carefully, keep beams on the intended surface and avoid lighting directly into the sky. A few well-chosen accents usually look more finished than a row of equally bright effects.
Why brighter can make it harder to see
Glare occurs when an overly bright source is visible against a darker background. The eye responds to that source, and details beyond it can become harder to see. This is why an unshielded floodlight near a walkway may create a bright foreground and a deep-looking dark area just beyond it. The National Park Service notes that glare can reduce visibility and interfere with the eye's ability to adapt to darkness.
The solution is usually not another floodlight. Hide the lamp, aim light downward, reduce output and place it closer to the surface that needs illumination. Shielding, careful aiming and contrast control often improve visibility with less total light.
Use five principles to evaluate every fixture
DarkSky International and the Illuminating Engineering Society organize responsible outdoor lighting around five principles. They make a practical checklist for a residential project:
- Useful: give each fixture a defined purpose. If it does not help with a task, route or chosen view, reconsider it.
- Targeted: direct the beam only where needed. Shield it and confirm that it does not enter windows or neighboring property.
- Low level: use the lowest output that performs the job. Consider surface reflectivity and nearby sources before adding more.
- Controlled: use timers, motion sensors, dimmers or other controls so light operates when it provides value.
- Warm-colored: choose warmer light where practical and avoid unnecessarily blue-white light around homes and landscapes.
These principles do not require a yard to be unlit. They help make the installation more comfortable for people, less intrusive to neighbors and more respectful of the night environment.
Choose the fixture for the job
Shielded path lights cast light toward the walking surface. Place them where they reveal a turn, edge or grade change rather than arranging them like runway markers. Keep fixtures outside the normal mower and snow-removal path and allow room for plants to mature.
Step, rail and wall lights put light close to changes in elevation. They work well when the source is concealed and the beam reaches the tread or landing instead of shining outward.
Downlights mounted in an appropriate tree or structure can create natural-looking pools of light. Hardware, mounting, plant health, wind movement, cable routing and future growth all need attention. Do not attach equipment to a tree without considering how it will be inspected and adjusted.
Small accent lights can reveal texture in a tree, façade or stone surface. Aim the beam onto the target, use shielding and verify the result from several viewing positions. Upward beams that miss their target waste light into the sky.
House-mounted entry lights should make the address, landing and lock visible without dominating the street. Fully shielded fixtures or designs that control the lamp can reduce glare compared with exposed clear-glass bulbs.
Light paths and steps without creating a runway
Path fixtures do not need identical spacing. Begin with hazards and decision points: the first step, a sharp turn, a gate latch, the edge of a bridge or the transition from concrete to gravel. Then fill only the truly confusing gaps. Alternating fixtures can produce a more natural rhythm than matched rows.
For steps, illuminate the tread or the face of the change in elevation. A person's shadow should not hide the very edge the fixture is meant to reveal. Test the approach from both directions. On a patio, low-level lighting in a seat wall or stair riser may integrate more cleanly than freestanding fixtures exposed to traffic.
Coordinate lighting with the physical condition of the route. It cannot correct loose pavers, poor drainage or an unstable step. If the surface is moving, address the underlying problem first; our guide to why patios and walkways sink explains what a lasting repair should evaluate.
Warm light usually fits residential landscapes best
Color temperature is measured in kelvins. Lower values generally appear warmer or more amber; higher values appear cooler or bluer. Around 2700K is a useful residential starting point because it tends to complement brick, wood, stone and plant material without making the yard look clinical. The National Park Service recommends warm-white light and lists 2700K as appropriate for most applications.
Color temperature is only one part of quality. A warm lamp can still glare if it is too bright or poorly aimed. Match color across related fixtures, compare samples against the actual materials and judge the result after dark rather than relying only on packaging.
Controls keep light available without leaving everything on
A photocell can turn a system on at dusk, while a timer turns it off later in the evening. Motion sensors can provide temporary light at a side entrance or service area. Dimming can lower output after activity ends. The U.S. Department of Energy describes photocells, scheduling and occupancy-based strategies as basic exterior-lighting controls.
Use controls to match actual routines. Entry and path lighting may be useful through the evening, while patio accents can turn off earlier. A security-related fixture may stay at a low level and brighten briefly on motion. Review time settings as sunset changes through the year, and avoid allowing every decorative light to run until morning simply because the system can.
Low voltage, line voltage or solar?
Low-voltage landscape systems
Low-voltage systems are common for paths, planting beds and patios because fixtures can be added and adjusted as the landscape develops. A transformer converts household power to the system voltage. Good performance still depends on correct transformer capacity, cable size, run length, connections, voltage drop, burial or protection and outdoor-rated components. “Low voltage” does not mean “no planning.”
Line-voltage lighting
House-mounted fixtures, some posts and larger equipment may use line voltage. This work must comply with applicable electrical requirements and is a job for a qualified electrician. Coordinate the electrician's work with the landscape plan so boxes, conduit, switching and fixture locations serve the finished space.
Solar fixtures
Solar lights can add decorative markers without cable trenches, but performance depends on direct sun, panel orientation, battery health, weather and season. A shaded fixture may fade long before the evening ends. Use solar where variable output is acceptable; do not depend on small decorative units as the only light for a critical step, primary entrance or essential work area.
Plan wiring before patios, beds and lawn are finished
Lighting is easier to install and service when it is coordinated with the rest of the property. Before laying a new patio or walkway, decide whether conduit or sleeves should cross beneath it. Choose an accessible transformer location with appropriate power, ventilation and room for future service. Map cable routes away from likely edging, aeration and excavation zones.
Coordinate with irrigation, drainage, tree roots and future planting. A cable installed beside a young shrub may be difficult to reach after the plant matures. A fixture placed in the snow-pile zone or beside a mower turn will be hit repeatedly. If several improvements are planned, our guide to what to fix first around your property can help establish the order.
Contact Kansas 811 before excavation and separately identify private facilities that participating utilities may not mark, such as irrigation, septic components, invisible fencing and existing landscape-lighting cable.
Electrical safety is part of the landscape plan
Use products listed and rated for their actual outdoor location, including exposure to rain, wet soil or damp covered areas. Outdoor receptacles and circuits need the protection required for the installation, including ground-fault protection where applicable. Connections must be made with compatible weather-resistant components rather than household wire nuts wrapped in tape.
The U.S. Consumer Product Safety Commission advises using outdoor-rated extension cords only for outdoor use and using ground-fault circuit interrupters. Extension cords are not a permanent wiring method. Damaged cords, overloaded transformers, exposed connections or repeated breaker trips require correction—not concealment under mulch.
A qualified electrician should handle line-voltage work and evaluate uncertain existing wiring. Local code, equipment instructions and site conditions take priority over general online advice.
Security lighting should support visibility, not create a fortress
Good lighting can help residents and visitors see doors, paths and activity around the home, but no fixture can promise to prevent crime. Extremely bright lights may create deep shadows, bother neighbors or obscure details with glare. Use controlled light at access points, aim cameras and lighting so they work together, and combine the plan with locks, clear sightlines and normal property maintenance.
Motion-activated lighting can call attention to activity without flooding the property all night. Test the sensor range so passing traffic, tree movement or animals do not trigger constant operation.
Maintenance keeps a good design working
Landscape lighting changes as plants grow and soil moves. Inspect it at least seasonally and after major yard work.
- Clean lenses and shields so dirt does not distort the beam.
- Trim vegetation that blocks light or presses against hot fixtures.
- Re-aim fixtures shifted by mowing, snow, pets or soil movement.
- Check visible cable, connections, mounting and transformer condition.
- Update timers as daylight and household routines change.
- Replace failed lamps or fixtures with compatible output and color so the design stays consistent.
After every adjustment, look from neighboring property lines and indoor windows. The goal is to keep useful light on your surfaces rather than allowing it to become someone else's glare.
A practical six-step lighting plan
- Document the night route. Photograph entries, steps, paths, parking and the patio from both directions.
- Correct physical hazards. Repair unstable steps, drainage problems and uneven surfaces before using light to call attention to them.
- Assign each light a job. Separate safety, wayfinding, task and accent needs.
- Choose the system and controls. Coordinate power, transformer, switching, timer, photocell and motion needs with qualified trades.
- Mock up after dark. Temporarily test fixture positions and view them from the path, street, house and neighboring direction.
- Install for future service. Protect routes, record cable locations and leave access to connections and equipment.
Planning a patio, path or landscape-lighting update?
Send CPS photos of the property in daylight and after dark, along with the routes, steps and gathering areas you want to improve. We can help connect the lighting plan with the surrounding hardscape and landscape work.
Frequently asked questions
How many landscape lights does my yard need?
There is no reliable fixture count based only on yard size. Start with entries, steps, path turns and activity areas. Add accents only where they improve depth or orientation. Purpose, placement and shielding matter more than filling every dark space.
What color temperature is best outdoors?
Warm-colored light is usually comfortable around homes, plants and natural materials. Around 2700K is a common starting point, but output, beam shape, shielding and the color of the illuminated surface also affect the result.
Are solar lights enough for safety?
They can mark a low-risk edge when they receive dependable sun, but output changes with weather, season and battery condition. Critical steps, doors and primary walks deserve a reliable system designed for the required visibility.
Can lighting be added after a patio is built?
Often yes. Existing hardscape may limit cable routes or require restoration, so assess access before choosing fixture locations. Lighting planned before new patio and hardscape work usually integrates more cleanly.
Do I need an electrician?
Use a qualified electrician for line-voltage work and changes to building electrical systems. Low-voltage installations still require correct outdoor-rated components, transformer sizing, connections, routing and protection.
Sources and further reading
- DarkSky International and IES: Five Principles for Responsible Outdoor Lighting
- National Park Service: Outdoor Lighting Principles
- U.S. Consumer Product Safety Commission: Electrical Safety
- U.S. Department of Energy: Exterior Lighting Control System Fundamentals
- Kansas 811: Homeowner safe-digging guidance